8. Carousel
Folder: 08_carousel/
Files: index.html, section6.css, carousel.js
Overview
The carousel card HTML structure is already provided in the style guide. Your job is to:
- Reference the style guide for the carousel card HTML structure
- Create the carousel section with navigation buttons and track
- Add multiple carousel cards (at least 3-4 for practice)
- Link the carousel CSS and JavaScript files
HTML (index.html)
Start with this HTML structure, which you will paste inside the <main></main> tag:
<!-- Section 6 (Carousel) -->
<section id="section-6">
<div class="container">
<article>
<h2 class="heading-1">Understories</h2>
<p class="heading-6">The backdoor to NYC's backyard</p>
</article>
<div class="carousel">
<button onclick="moveBackward()" class="slick-prev slick-arrow" aria-label="Previous" type="button">Previous</button>
<button onclick="moveForward()" class="slick-next slick-arrow" aria-label="Next" type="button">Next</button>
<div>
<div class="slick-track">
<!-- TODO: Add carousel cards here using the pattern from style guide -->
</div>
</div>
</div>
<a href="https://naturalareasnyc.org/understories/" class="btn primary" target="">View All</a>
</div>
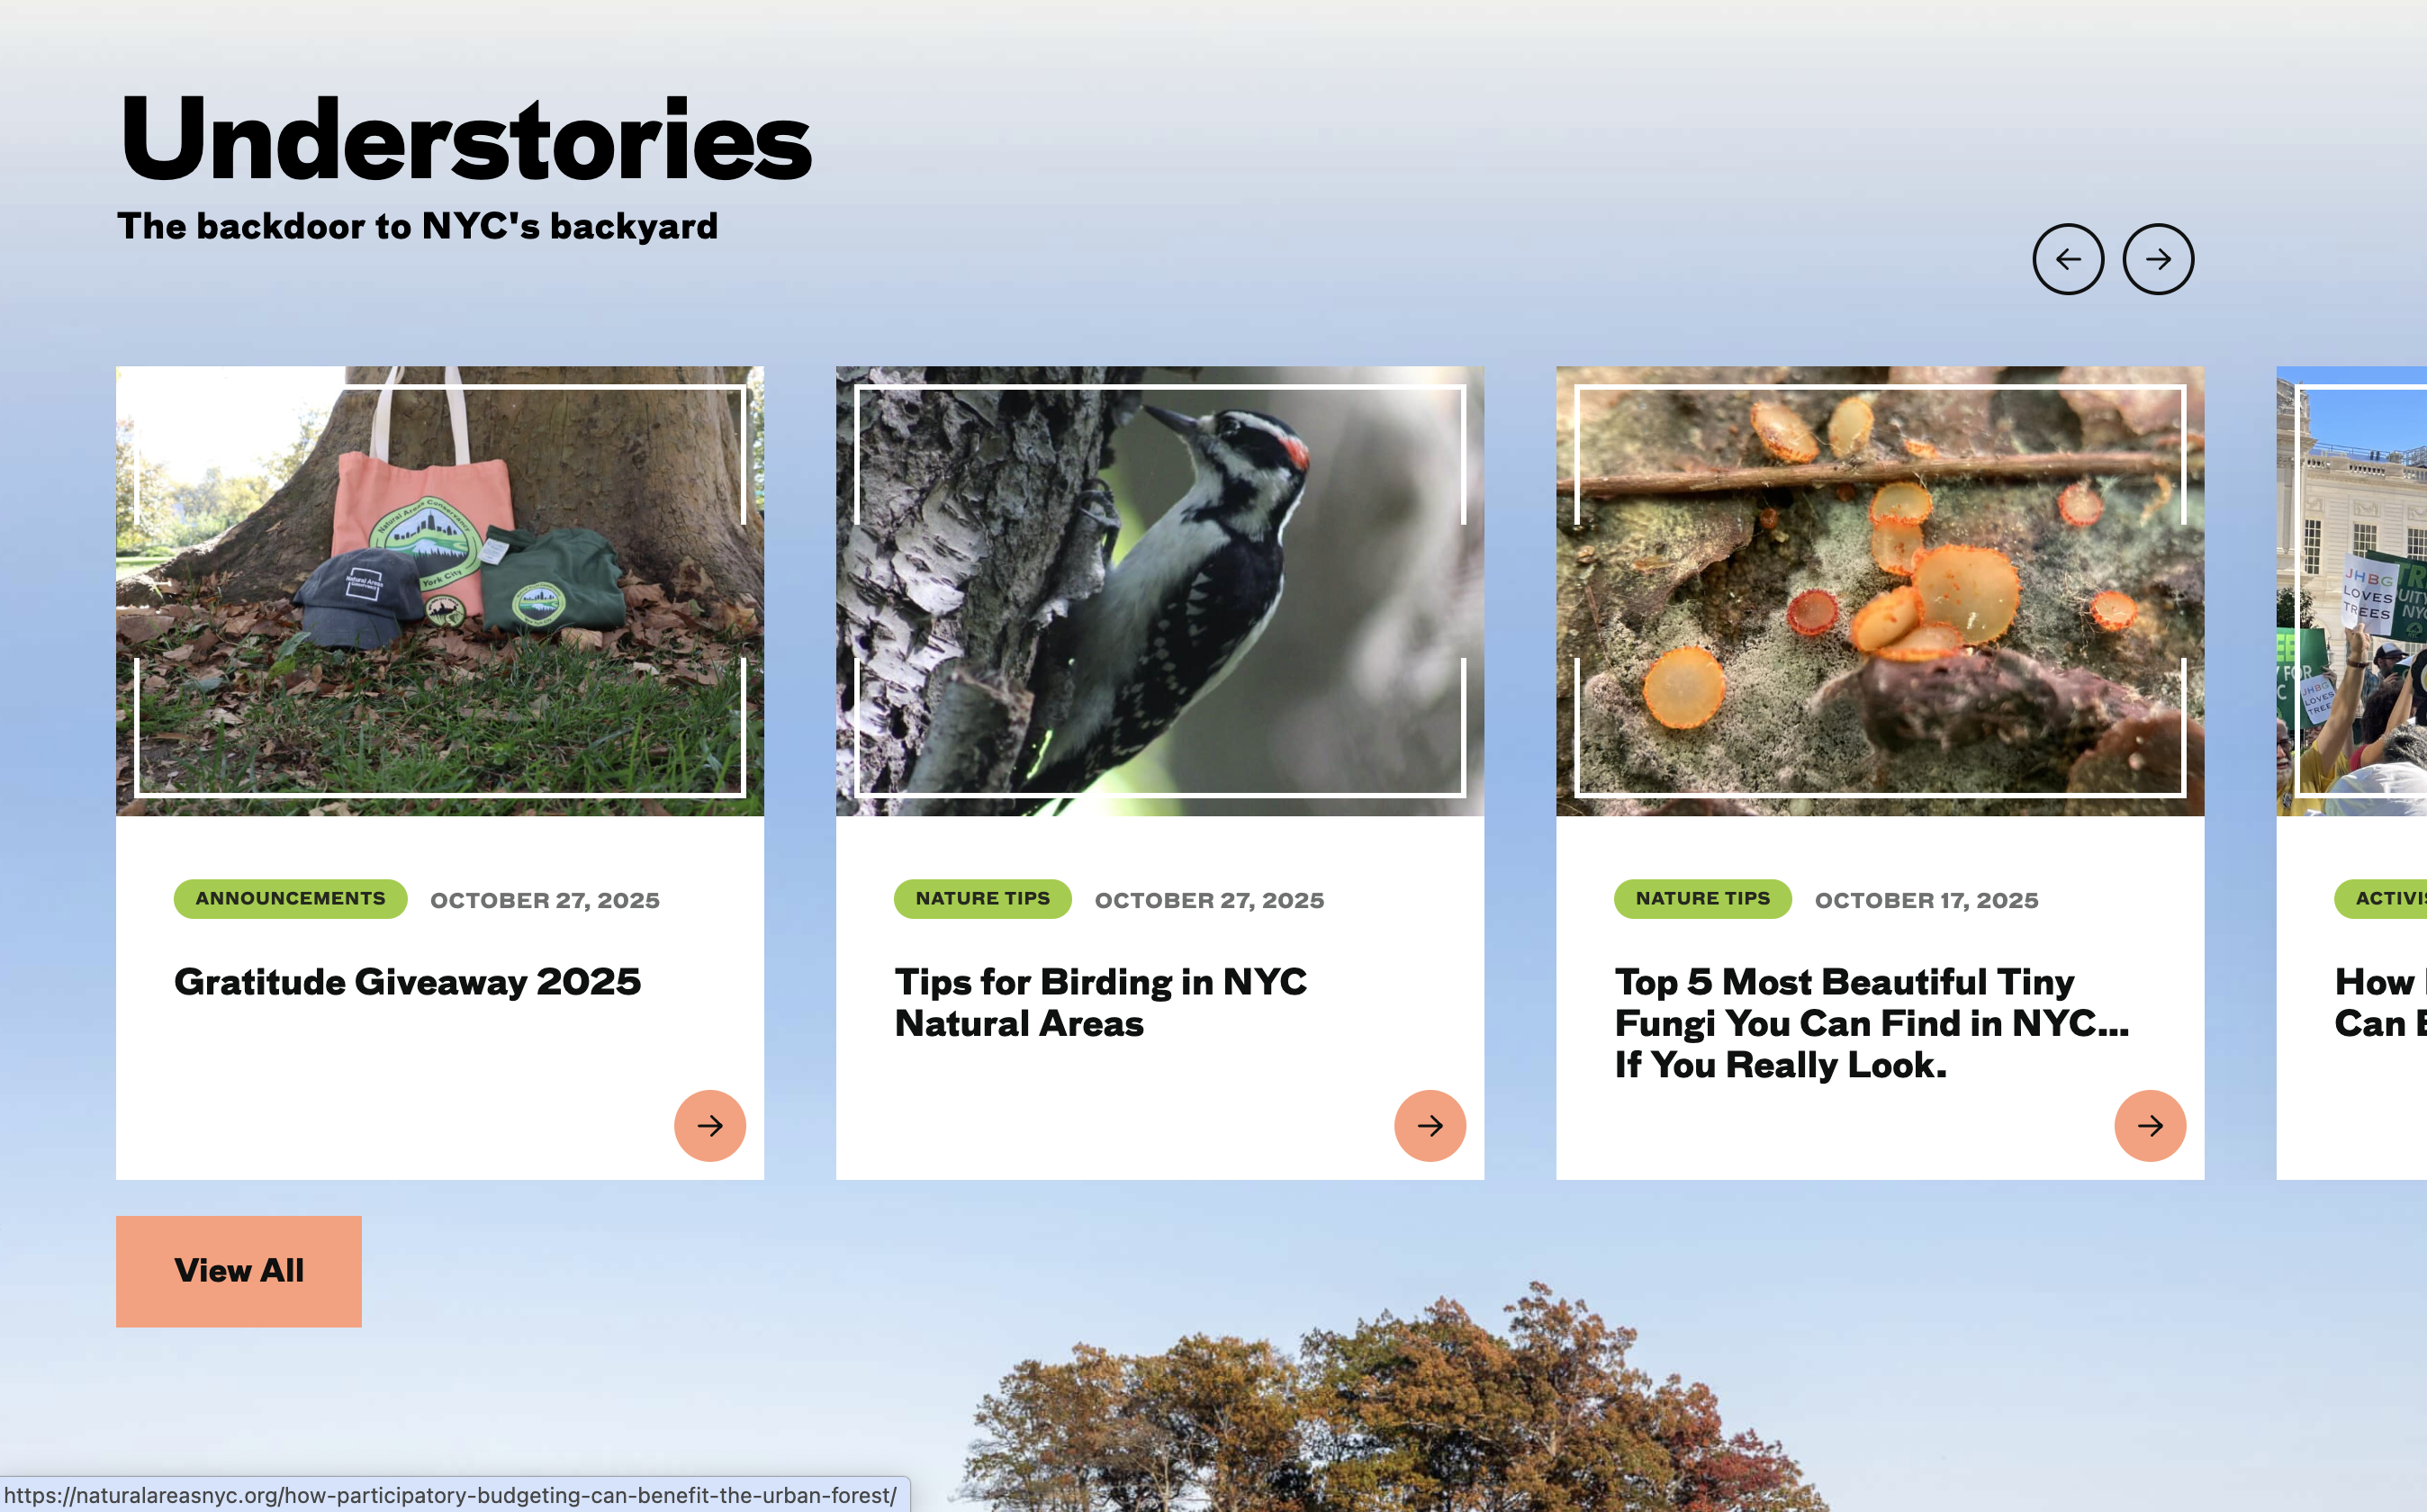
</section>Your task: Refer to the Style Guide Demo and look for the Carousel Card Pattern (Section 6 Style) in the "Hero Section and Cards" area. Copy that HTML structure and wrap each card in a <div class="slide slick-slide"> element. Create at least 3-4 carousel cards with your own content.
Content for each carousel card should include:
- Image: Use images from
../images/carousel-1.jpgthroughcarousel-10.jpg(or use any images you have) - Pill: A category tag using
<span class="pill small green">(e.g., "Announcements", "Nature Tips", "Education", "Activism", "Event", "Science") - Caption: A date using
<span class="caption">(e.g., "October 27, 2025") - Heading: A title using
<h3 class="heading-5">(e.g., "Gratitude Giveaway 2025", "Tips for Birding in NYC Natural Areas") - Link: Each card should link to a relevant URL (you can use placeholder URLs like
#or actual links)
Note: Each slide should be wrapped like this:
<div class="slide slick-slide">
    <!-- Carousel card HTML from style guide -->
</div>
CSS (section6.css)
Attach the stylesheet in your HTML <head>:
<link rel="stylesheet" href="section6.css">Start with this CSS:
#section-6 {
  background-image: url(../images/section-6-bkg.jpg);
  background-size: cover;
  background-repeat: no-repeat;
  background-position: center bottom;
  padding-top: 50px;
  padding-bottom: 350px;
}

#section-6 .heading-1 {
  margin: 0;
}

.carousel-card .heading-5 {
  font-size: 1.2rem;
}

#section-6 .card {
  width: 360px;
}

#section-6 .card .media {
  height: 250px;
  width: 100%;
}
Note: The carousel-specific styles (track, arrows, navigation) are already included in utility-classes.css, so you don't need a separate carousel.css file. Make sure you've linked utility-classes.css in your HTML.
JavaScript (carousel.js)
Attach this script in your HTML <head> or before closing </body>:
<script src="carousel.js" defer></script>This file contains the carousel functionality:
moveForward()- Moves carousel to the next slidemoveBackward()- Moves carousel to the previous slideupdateCarouselPosition()- Calculates and applies the transform
How it works:
- Uses
transform: translateX()to move the carousel track horizontally - Calculates offset based on slide width (360px) + gap (40px) × current position
- Loops back to start/end when reaching boundaries